I took some video of the dome to give a better feel of its size and how things are laid out in relation to each other.
Tuesday, August 14, 2012

Monday, July 30, 2012
Aquaponics and Sustainable living
Drawings of sustainable living solutions and a design and price estimation for a aquaponic greenhouse. I figured they would be more useful if they were posted on the web them rather than letting them sit in a folder.


Aquaponic and Compost system
The greenhouse works as a living symbiotic system, kinda like a plant or animal cell.
Water : Blood
Pump : Heart
Pipes and Trays : Artery and Viens
Gravel trays : Liver
Plants : Lungs and Bladder
Greenhouse Covering : Skin
Growing Trays and Greenhouse Frame : Skeleton
Compost Bins : Stomach
Worm Bins : Intestine
Worms and Bacteria : Beneficial Bacteria
(there are at least ten times as many bacteria as human cells in our body)
The Heart of the system is the aquaponic setup, water is pumped from the 2500 gal fish tank to ebb and flow growing trays where water is filtered by plants and bacteria on gravel then oxygenated when falling back to the main tank.
The large volume of water is what keeps the greenhouse cooler in the summer and warmer in the winter, because water takes more energy to heat up than air it acts as a coolant within the greenhouse when air temperatures are high and when then air temperature is lower than the water temp the water acts as a heater. The aquaponic trays have a large surface area and function as a radiator that are either absorbing or releasing energy to the surrounding air in the greenhouse.
If the aquaponic system is the heart then the composting bins and the worm bins are the stomach and digestive tract of the greenhouse. The compost bins are on the north side (shady) of the hoop house and are used as a thermal mass to regulate the greenhouse temperature. The bins are filled with pretty much any type of organic waste with exception to human or unverified animal waste and meat . The compost is them moved to worm bins on the south side of the hoop house where the compost is further broken-down by thousands of hungry worms.
After three months in the worm bins the compost is removed, most of the worms are removed and the compost rich in worm castings in put in 3 gallon pots mixed with shredded coconut husk. The pots are put in the aquaponic grow trays where they are planted with the desired crop. A single pot in my dome can sustain healthy plant growth for 10-14 months before the pot is removed from the grow tray and the material is recycled to outdoor compost bins.
By combining soil growing and the aquaponic system pants can grow heather with an abundance of trace minerals and nutrients. Even more importantly though, more species of nitrifying bacteria can be supported in the soil/coco/gravel medium than just gravel or expanded clay mediums. The few worms left in the compost can also crawl out of the pots when the trays drain and feed on decomposing organic matter in the gravel then retreat back to the pots when the beds refill with water.
By combining soil growing and the aquaponic system pants can grow heather with an abundance of trace minerals and nutrients. Even more importantly though, more species of nitrifying bacteria can be supported in the soil/coco/gravel medium than just gravel or expanded clay mediums. The few worms left in the compost can also crawl out of the pots when the trays drain and feed on decomposing organic matter in the gravel then retreat back to the pots when the beds refill with water.
Aquaponic greenhouse design

The prototype trays from the previous post Aquaponic-Growing-Trays are the ones for this design.

Sunday, July 22, 2012
Aquaponic growing trays
I have been wanting to go bigger with my ideas so I decided to send it and make another mess and built the prototypes for my next aquaponic system. More on this later...

This design requires some digging for the in ground tank, 24" will be bellow ground level with 6" above ground level.

One 4' x 8' x 4" grow tray on top with two 4' x 4' x 18" worm bins underneath

Thursday, July 5, 2012
Photo update: Aquaponic Greenhouse 7/5/12
The dome is fully alive now, very exciting after a little more than a year of work.
The plants are growing like crazy, the fish getting fatter, the water temperatures are nice and high (72-76 Deg F) and all sorts of critters have taken up home in the dome.
Aquaponic gardening it the bees knees.

Panoramic shots


Simple free compost bins can easily be made from shipping pallets.

4'x8' Covered bed
This small bed drinks 10 gallons of water a day
where the dome takes between 10 and 15 gallons
of water a day to maintain a 650 gallon tank.

This is what $144 of tilapia look like.
I ordered 50 small fingerlings from a hatchery on the net and wound up paying 99 cents a fish and $90 for shipping.

Tuesday, April 3, 2012
Geodesic Greenhouse
The top trays have been knocked up with pea, lettuce, spinach and other greens and they are sprouted and growing quickly. I plan on weaving a canopy of peas and beans that can be snacked on while sitting on the ceiling bench.

The dome is starting to kick out some greens now that the days are growing longer and soon I will have more than we can eat by our selves. I ordered a small amount duckweed which will be grown inside in a plant based water filter and then added to the main tank in the dome. Once the water is cleaned up more by plants I will look into adding fish to produce waste to feed the plants.

I moved the winter batch of compost in to a planter in the front yard and have been refilling the bins with leaves from neighbors yards. On that note, I find that most people don`t have a composting bin or some means of disposing organic waste and either landfill or let the city dispose of their organic waste.


Tuesday, February 28, 2012
Geodome with snow

Dome on 2/28/12

Working on the second set of plant trays but I ran out of material.

Most of the buckets were seeded on 2/10/12 and on 2/26/12 all most all of the
seeded pots had sprouted and had their first set of leafs.

Bike Trailer
I have wanted to make a bike trailer for larger items like recycling trips, straw bales or anything to big to carry in my backpack.
35 bucks worth of wood and angle iron
20 bucks on pipes, clamps and a swivel caster
I had tubing, bike wheels and screws laying around.

Trailer hitch made from 3/4" galvanized pipe, four pipe clamps, a swivel caster and thick tubing to protect the frame from damage.

Six1.5"x2.5" studs and angle iron.

Angle iron cut to 6" long, slotted for wheels and drilled mounting holes.

A swivel caster makes a great trailer hitch.

Trailer frame assembled with wheels.

Plywood bed attached, the cart is 30"x63" and weighs at least 50 lbs.
Thursday, February 2, 2012
Aquaponic Geodesic Dome Green House

1000 gallon tank

Mocking up trays

Attaching the skin

Adding the second layer

Mixing cob in bath tub, a mixture of soil from the yard, sand and straw.
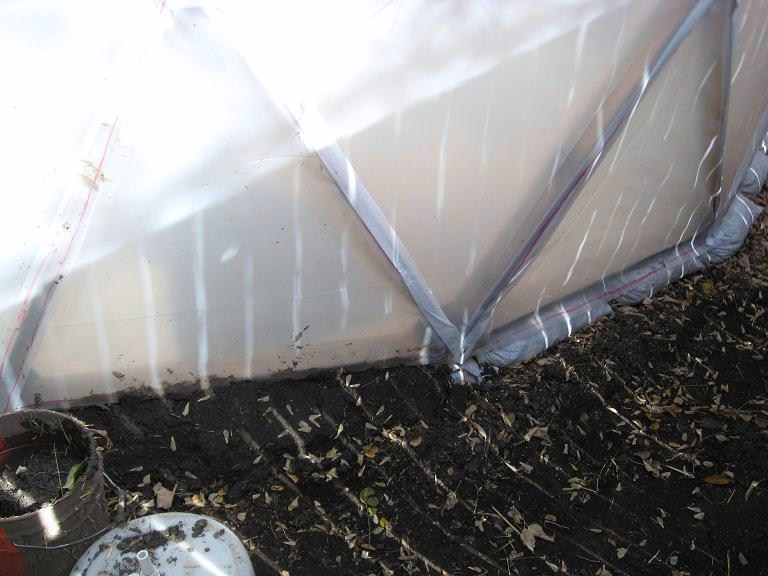
Sealing the perimeter with cob

Dome completely sealed

water tank and filter trays

Rocket mass heater and compost bins

Water gets pumped up, filtered in tank of stone and piped down to plant trays

3 gallon buckets with 50/50 mix of ground coco husk and composted manure mix
Saturday, March 28, 2009
Fast Tires
A short update on the Bontrager XR1 tires.
These are the FASTEST tires I have ever ridden..... by a good bit. They roll sooo fast and have good cornering grip. I am running them tubeless on my 355, American classic, Revolution wheel set with yellow tape. They are a non-tubeless tire with a high tpi count and very soft rubber.
They weigh 488.4g, the lightest crow I ever had was 465.5g but I could not run crows in the front and rear so the XR1 works out to be lighter than the Crow and Karma combo. Though its not the weight that makes these tires fast. The tread pattern is very fast, faster than the Crow`s by a bit. The rubber compound is a little softer on the XR1 giving it good cornering grip. I am really looking forward to see how they will wear in.
My bike with a few new items some of which have not been seen will lower my bike to 19lbs with gears.
These are the FASTEST tires I have ever ridden..... by a good bit. They roll sooo fast and have good cornering grip. I am running them tubeless on my 355, American classic, Revolution wheel set with yellow tape. They are a non-tubeless tire with a high tpi count and very soft rubber.
They weigh 488.4g, the lightest crow I ever had was 465.5g but I could not run crows in the front and rear so the XR1 works out to be lighter than the Crow and Karma combo. Though its not the weight that makes these tires fast. The tread pattern is very fast, faster than the Crow`s by a bit. The rubber compound is a little softer on the XR1 giving it good cornering grip. I am really looking forward to see how they will wear in.
My bike with a few new items some of which have not been seen will lower my bike to 19lbs with gears.
Friday, February 27, 2009
Races start
this weekend. We will be hitting up Colorado Springs and Fort Collins for some crit racing. Not looking forward to the eight hour drive form Durango to Fort Collins. Hopefully I can get a chance to get some riding in at Fort Collins. Whoopeee.
Tuesday, February 24, 2009
Not impressed yet
The new Sram XX group set was officially released today. No specs have been released to the public and there will most likely be changes to what you see here.

Upon first seeing the press release I was excited but soon let down to see that the brakes are only slimmed down Elixers with a one piece bar clamp, the front derailleur is a slightly lighter version of the current X.9, the rear derailleur is a mix between Red and X.0 and grip shift is not being offered yet.
The highlight of the groupo is the crankset. The spindle looks to be a BB30 in the picture and the rings are bolted to two different mounts, hopefully meaning it is a low chainline setup. The down side to the crank though is you will most likely be limited to a narrow chainring selection.

Upon first seeing the press release I was excited but soon let down to see that the brakes are only slimmed down Elixers with a one piece bar clamp, the front derailleur is a slightly lighter version of the current X.9, the rear derailleur is a mix between Red and X.0 and grip shift is not being offered yet.
The highlight of the groupo is the crankset. The spindle looks to be a BB30 in the picture and the rings are bolted to two different mounts, hopefully meaning it is a low chainline setup. The down side to the crank though is you will most likely be limited to a narrow chainring selection.
 At least the brakes should be light.
Sunday, February 15, 2009
Parts and stuff
 All the parts are Bontrager, and thats fine. I picked out a bar, stem and seatpost combo that would all lean towards efficiency. The bar I chose was the XXX riser. It weighs a heafty 50g g more than my EC70 but is wider, 580 to 630, stiffer and has more sweep, 5deg to 7deg.
For the stem I chose a XXX stem. This was the hardest decision to make due to my fit. The XXX stem comes in one angle, 17deg, where the model down the X Lite comes in two, 7deg and 17deg. The XXX stem would give me the best fit bewteen my Race Lite Big Sweep and the XXX Rizer, but was 157g vs 114g for the same effectice length. I went with the XXX based on fit and the hopes of superb stiffness and I feel that it has delivered.

 For seatpost and saddle I went for the XXX post and the RXL saddle. The post was an easy choice due to its light weight compated to my Thomson, 297g vs. 170g, and its simple design.
The saddle was my only iffy choice. I really didnt want to end up switching all my saddles out and buying new ones but I bought in to try for the spring on the 29er. So far so good, I got my ass sized at the local trek store and ordered up. It has a narrower fit than my custom SLR saddles and was quite comfortable. The bikes new weight as is, is 19.15lbs
More later....
Friday, February 13, 2009
Bontrager XR1 Team Issue
I just received a pair on Team Issue XR1 tires and I thought that I should share. The tires are intended for fast courses and tubes. There are two versions of the tire, a Team Issue and a Expert issue. The both have the same tread pattern but the Team issue has a softer rubber and thinner rubber. They have a claimed weight of 565g for the expert and 510g for the Team Issue.
My tires came in at 488g and 506g which made me very happy. There is now a tire option as light as a crow but with taller knobs.
Tubeless inflation on my 355 with yellow tape was not easy. It took 80psi form my portable 10 gal air tank, removal of the valve core and a lot of time. My difficulty was based on my past experience with Bontrager tires. Normally I can get Bontrager Tubeless and non-tubless tires to inflate with a floor pump. Any one with quality air compressor should have no problems.

They are labeled as 1.9" or 48/48 but are more like a 2.0 and take on a round profile when inflated. The look small when compared to my Karmas and ACX tires.
 More to come once my flu bug goes away and I get a chance to rally them.
My tires came in at 488g and 506g which made me very happy. There is now a tire option as light as a crow but with taller knobs.
Tubeless inflation on my 355 with yellow tape was not easy. It took 80psi form my portable 10 gal air tank, removal of the valve core and a lot of time. My difficulty was based on my past experience with Bontrager tires. Normally I can get Bontrager Tubeless and non-tubless tires to inflate with a floor pump. Any one with quality air compressor should have no problems.

They are labeled as 1.9" or 48/48 but are more like a 2.0 and take on a round profile when inflated. The look small when compared to my Karmas and ACX tires.
 More to come once my flu bug goes away and I get a chance to rally them.
Friday, January 30, 2009

Subscribe to:
Posts (Atom)
